
8853 - Porsche 911 Carrera (993) Timing Tool
- Use for holding/setting the timing system on Porsche 911 (993) engines
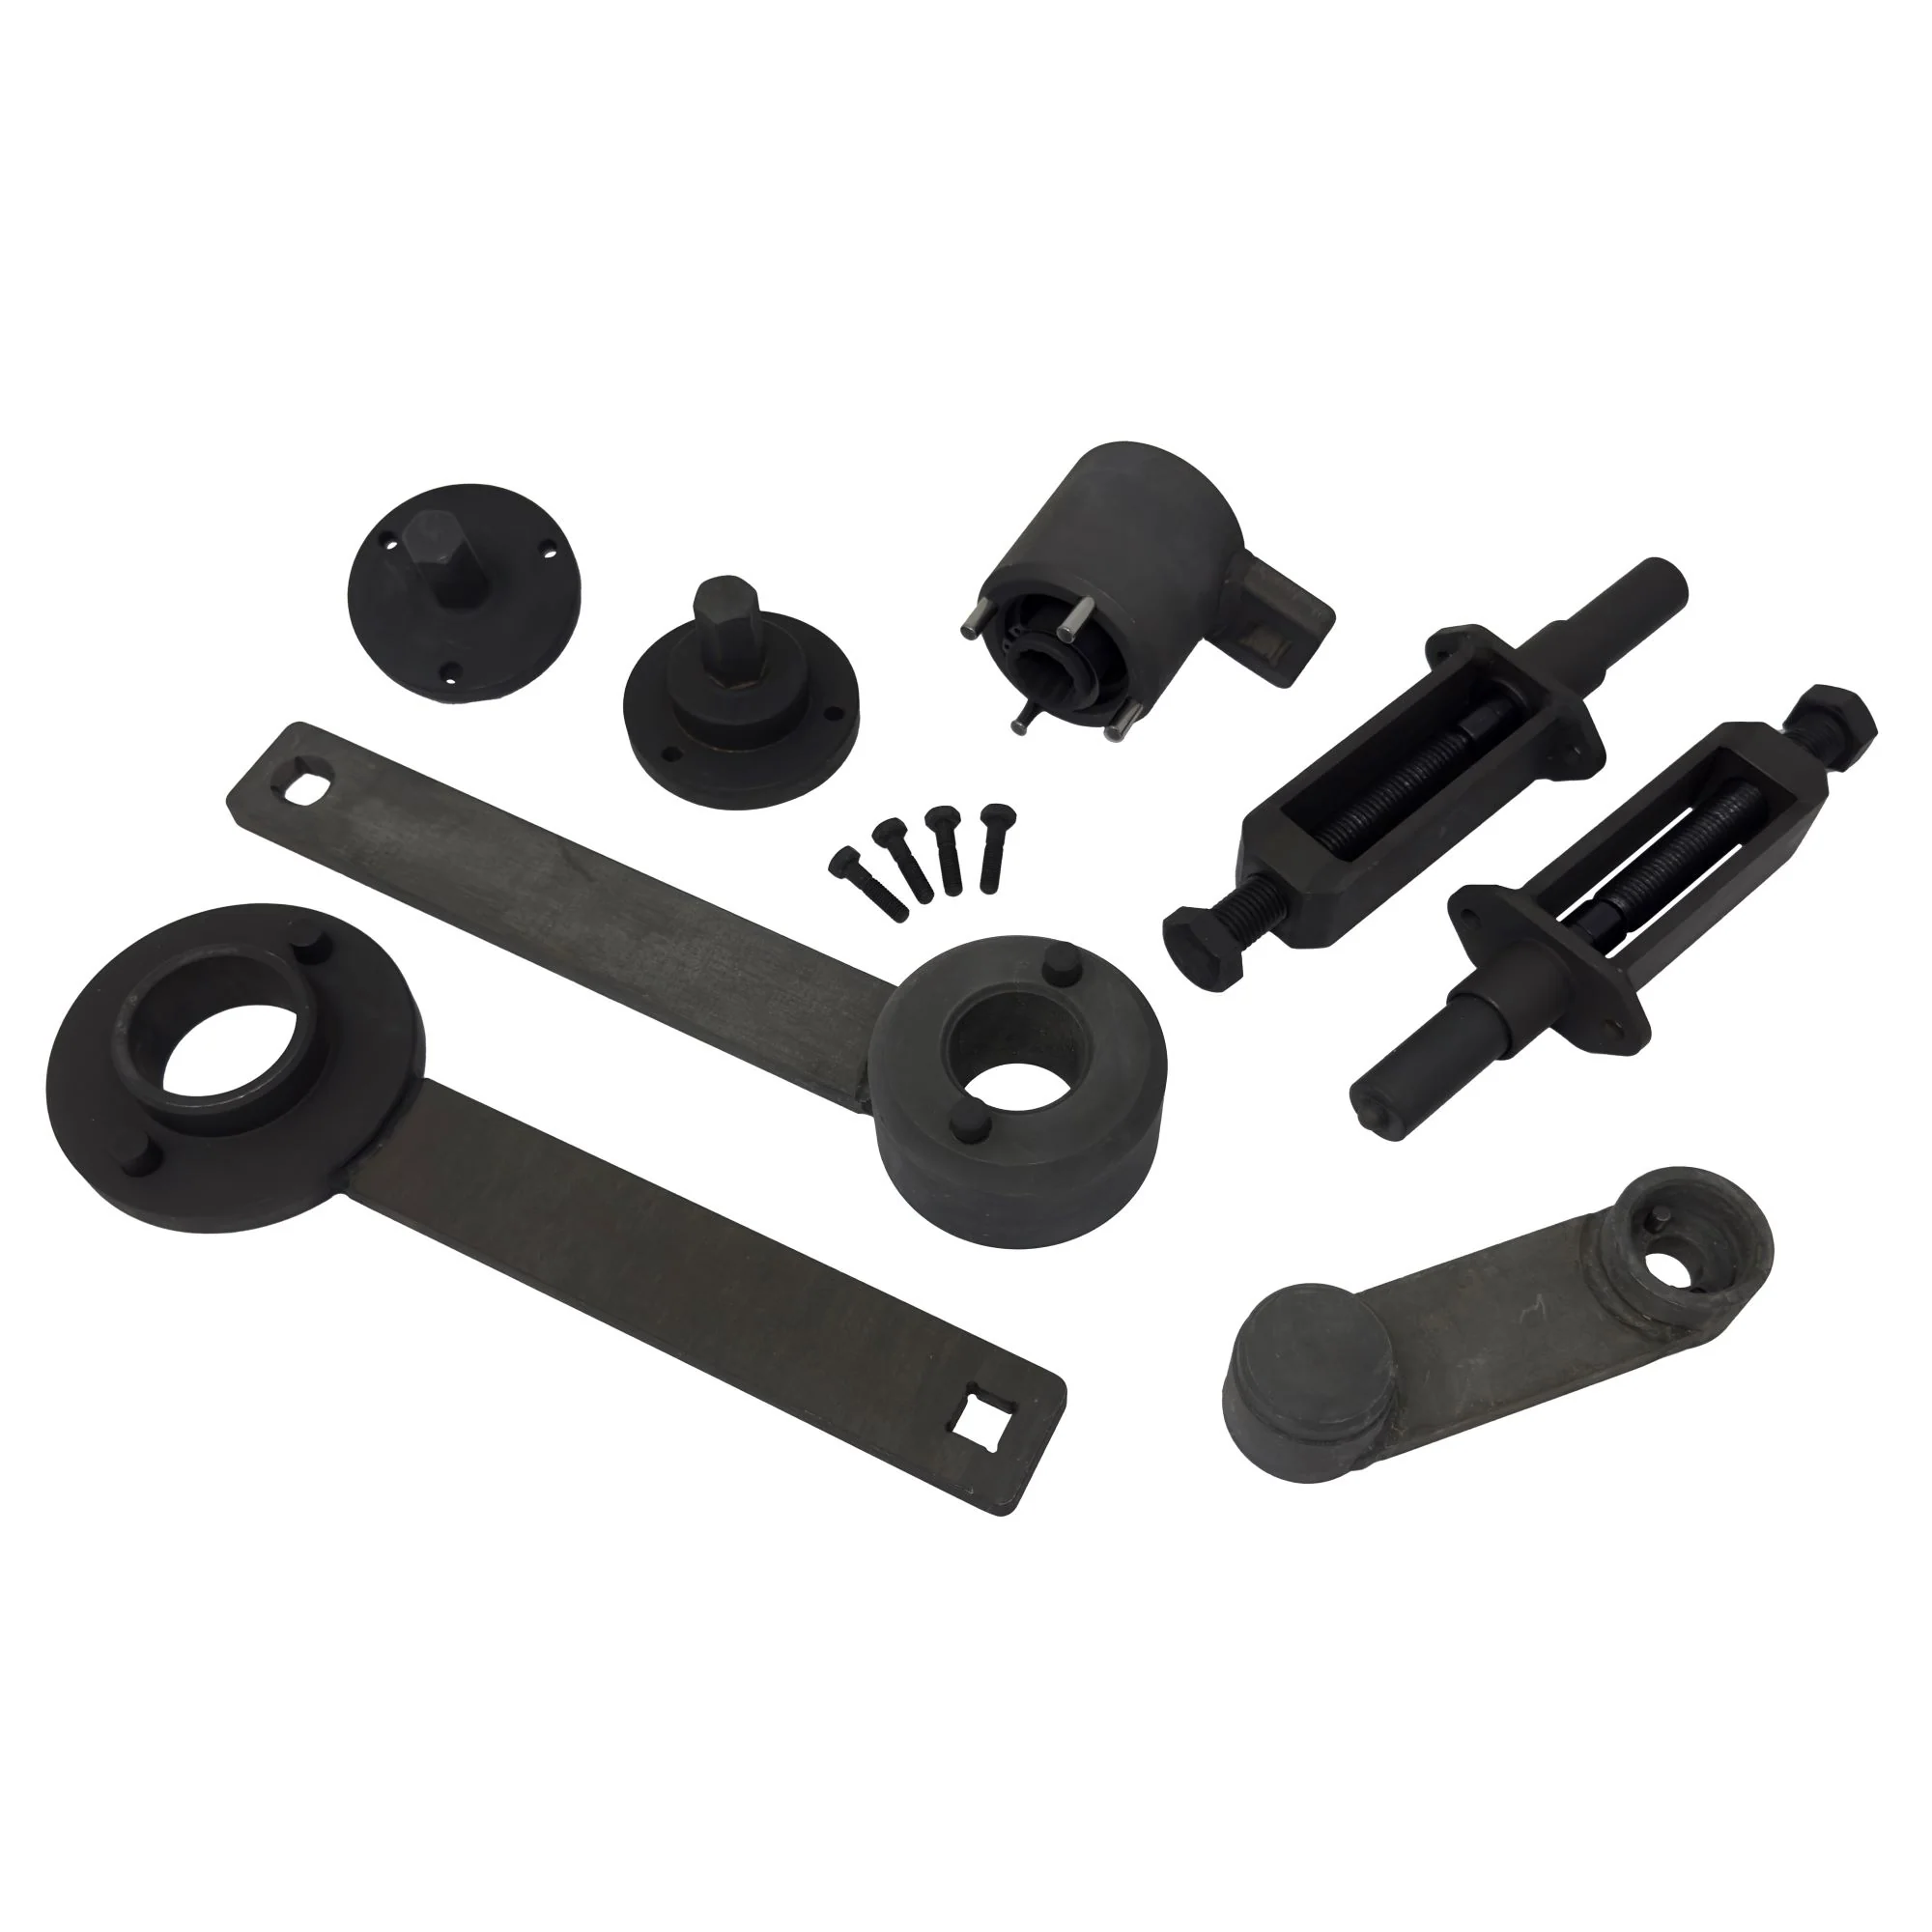
- Includes cam setting tools for holding camshafts during timing adjustments, fixture bolts, position holder, and key for crankshaft and pulley alignment, and sprocket holder for cam gear alignment with the 4-hole sprocket
- Designed for the last generation of Porsche air-cooled flat engines
- Applications: 911 (993) Carrera models 1993-1998
- Stored in a blow mold case (BMC) with a laser-cut foam inlay (EVA)
Click here to view product flyer
Instructions
INSTRUCTIONS:
1. Identify Engine Type:
• Confirm the specific Porsche 911 (993) engine model: 3.6 L M64/01 (Air-Cooled), 3.6 L M64/03 (Air-Cooled), or 3.6 L M64/50 (Turbocharged).
2. Cam Setting (Air-Cooled Engines):
• Insert Cam Setting Tool - V1 into the left bank camshaft and Tool - V2 into the right bank camshaft.
• Ensure the tools fit securely and align with the timing marks on the camshafts.
3. Cam Setting (Turbocharged Engine):
• For the Turbocharged engine (M64/50), use the Turbo-specific cam setting instructions provided in the CTA 8853 kit.
• Follow the vehicle manufacture guidelines for proper camshaft positioning.
4. Auxiliary Chain Tensioners:
• Install the Auxiliary Chain Tensioners (3888) into the designated locations on the engine according to the vehicle manufacture guidelines.
• Tighten the tensioners according to the manufacturer's specifications.
5. Crankshaft Holding:
• Utilize the Crankshaft Holding Key & Sprocket Holder (7458) to immobilize the crankshaft.
• Secure the tool onto the crankshaft sprocket to prevent movement during adjustments.
6. Fixture Bolts:
• Attach the Fixture Bolts to stabilize the timing components.
• Tighten the bolts securely to maintain the correct alignment.
7. Verify Alignment:
• Double-check the alignment of all timing components.
• Ensure that timing marks on camshafts and the crankshaft align correctly according to vehicle manufacture guidelines.
8. Reassemble:
• Once timing adjustments are complete, remove all tools carefully.
• Reinstall any covers and components removed during the process.
9. Final Checks:
• Conduct a final inspection to ensure all components are securely in place.
• Reconnect the battery.
• Start the engine and monitor for any unusual sounds or issues.
• Confirm proper engine operation and smooth performance.
Product Information
Product Information
Shipping & Returns
Shipping & Returns
Description
- Use for holding/setting the timing system on Porsche 911 (993) engines
- Includes cam setting tools for holding camshafts during timing adjustments, fixture bolts, position holder, and key for crankshaft and pulley alignment, and sprocket holder for cam gear alignment with the 4-hole sprocket
- Designed for the last generation of Porsche air-cooled flat engines
- Applications: 911 (993) Carrera models 1993-1998
- Stored in a blow mold case (BMC) with a laser-cut foam inlay (EVA)
Click here to view product flyer
Instructions
INSTRUCTIONS:
1. Identify Engine Type:
• Confirm the specific Porsche 911 (993) engine model: 3.6 L M64/01 (Air-Cooled), 3.6 L M64/03 (Air-Cooled), or 3.6 L M64/50 (Turbocharged).
2. Cam Setting (Air-Cooled Engines):
• Insert Cam Setting Tool - V1 into the left bank camshaft and Tool - V2 into the right bank camshaft.
• Ensure the tools fit securely and align with the timing marks on the camshafts.
3. Cam Setting (Turbocharged Engine):
• For the Turbocharged engine (M64/50), use the Turbo-specific cam setting instructions provided in the CTA 8853 kit.
• Follow the vehicle manufacture guidelines for proper camshaft positioning.
4. Auxiliary Chain Tensioners:
• Install the Auxiliary Chain Tensioners (3888) into the designated locations on the engine according to the vehicle manufacture guidelines.
• Tighten the tensioners according to the manufacturer's specifications.
5. Crankshaft Holding:
• Utilize the Crankshaft Holding Key & Sprocket Holder (7458) to immobilize the crankshaft.
• Secure the tool onto the crankshaft sprocket to prevent movement during adjustments.
6. Fixture Bolts:
• Attach the Fixture Bolts to stabilize the timing components.
• Tighten the bolts securely to maintain the correct alignment.
7. Verify Alignment:
• Double-check the alignment of all timing components.
• Ensure that timing marks on camshafts and the crankshaft align correctly according to vehicle manufacture guidelines.
8. Reassemble:
• Once timing adjustments are complete, remove all tools carefully.
• Reinstall any covers and components removed during the process.
9. Final Checks:
• Conduct a final inspection to ensure all components are securely in place.
• Reconnect the battery.
• Start the engine and monitor for any unusual sounds or issues.
• Confirm proper engine operation and smooth performance.